Showing posts with label condiments. Show all posts

Wednesday, 19 August 2015

Garlic Chutney Recipe

This fiery red garlicky chutney can be a life-saver. It's a 3-ingredient recipe that takes very little time to make. And it can be stored for up to a month in the freezer.

Garlic Chutney Recipe

And there are so many uses of this chutney. Add it to pav bhaji (recipe here) while cooking after the tomatoes are done and before you add the potatoes. Use it as a topping for your ragda patties (recipe here). Add it as a spread to your frankie (recipe here). Mix it into your dal ke parathe (recipe here) dough for an extra zing! Or serve it as an accompaniment to your wada pav (recipe here), bhajiyas/ pakoras (recipe here) and cutlets (recipe here)

Garlic Chutney Recipe

The uses of this 'wonder' chutney are only limited by your imagination! 

Garlic Chutney Recipe

Preparation Time: 40 minutes
Making Time: 5 minutes

Makes: about 1 cup of chutney

Ingredients:

20 dried whole red kashmiri chillies
2 cups warm water to soak
30-35 cloves of garlic
1 tsp corriander powder
2-3 tsps water to grind
Salt to taste

Method:

De-seed the kashmiri chillies. A trick to do this is to use a scissor, cut the top open and squeeze till the seeds all fall out.

Soak the deseeded chilles in the warm water for half an hour. Drain the water away.

In a grinder, grind together the soaked chillies, garlic, corriander powder and salt with a little water to form a smooth paste.

Store in a clean airtight container in the freezer.

Sunday, 31 May 2015

Tilachi Chutney (White Sesame Seed Chutney) Recipe

If you've read my Storypick article , you'll remember that I strongly believe that nobody does condiments like we Indians do. I just checked my pantry yesterday and saw 3 types of spicy pickles, 2 types of sweet pickles and 2 types of dry chutneys. I still felt like making this chutney because it's my husband's favourite (and you can never have too many chutneys!). No wonder, we've ended up adding the word 'chutney' to the English language!

Tilachi Chutney (White Sesame Seed Chutney) Recipe

Tilachi chutney is a quick fix for your spice cravings. It takes exactly 15 minutes to make and has beautiful combination of nutty, pungent and salty flavours. You can eat it like you'd eat pickles. It makes for a great accompaniment to your everyday roti, sabzi and dal chawal. I particularly like to add zing to my varan-bhaath (steamed rice with steamed toor dal) with it.

Tilachi Chutney (White Sesame Seed Chutney) Recipe
Let's not forget that white sesame seeds also have many health benefits.They have oleic acid that helps lower the LDL (bad cholesterol). They're also a rich source of anti-oxidants, growth proteins and Vitamin B. This chutney takes very little cooking, therefore preserving these nutrients. So, eating this chutney makes for a great way to get all these micro-nutrients.

Tilachi Chutney (White Sesame Seed Chutney) Recipe

Preparation Time: 5 minutes
Making Time: 10 minutes
Total Time: 15 minutes

Ingredients:

50gms white sesame seeds
2 tsps Kashmiri red chilly powder
1 dried kokum
Salt to taste

Method:

Dry roast the sesame seeds on a low flame. They're done when they just start to pop out of the pan (about 4-5 minutes). 

Let them cool for about 2 minutes.

In a mixer grind together the roasted sesame seeds, the dried kokum, the red chilly powder and the salt. Grind for about 2 minutes till it forms a smooth powder. Don't grind too much or the sesame seeds will start releasing oil.

Serve as an accompaniment to virtually anything!

Tuesday, 31 March 2015

Gula Melaka Syrup Recipe

It must have been so thankful to see the light of the day. It's been lying in the refrigerator since I got it from Singapore almost a year back. Oh, I am talking about gula melaka.

Gula Melaka


Gula melaka is a palm sugar made from the sap of coconut trees. Gula melaka has a beautiful rich, malty taste with notes of butterscotch flavour. It is a regular ingredient of South East Asian cooking, especially desserts. It is served over shaved ice in a kechang, poured over sago in a sago pudding, put into falooda-like drinks with sago, coconut milk and fresh tropical fruits. To every dish, it brings a uniquely sweet flavour that you will crave.

Think of innovative ways to use this syrup. I am coming up with some in the next few days!!
Gula Melaka Syrup Recipe

It is very easy to make a syrup of this sugar. It takes 2 ingredients and 10 minutes. The results, however, are priceless!

Gula Melaka Syrup Recipe

Preparation Time: 5 minutes
Cooking Time: 10 minutes

Ingredients:

150 gms gula melaka chopped
60 ml water

Method

Chop the gula melaka into small pieces.

Heat a small pan and add the water and gula melaka.

After the water warms a little, lower the flame.

Keep stirring till the gula melaka melts gently into the water. Do not put it on high flame, or it will burn the sugar.

Remove from heat, and pour it in another cold vessel.

Let it cool completely into a thick golden syrup before you store.


Thursday, 19 March 2015

Kerala Style Red Coconut Chutney Recipe

You wake up in the morning: still half asleep. Then you remember that you will be having idlis for breakfast. What excitement! And to remember that you've also put red chillies to soak for your favourite chutney... trust me, that just wakes you up!

Idlis with Kerala Style Red Coconut Chutney (Recipe)

This chutney is a particular favourite of my husband. Every time we had it at any restaurant, he'd say, "Please learn how to make this!" I used Google to search for some recipes, added my two cents, and voila! I've come up with a recipe for this chutney that he likes!  Success!

Kerala Style Red Coconut Chutney Recipe

Kerala Style Red Coconut Chutney Recipe

Preparation Time: 30 minutes (to soak the red chillies)
Making Time: 5 minutes

Serves: 4

Ingredients:

For the chutney

3 dried kashmiri red chillies 
1/2 cup warm water
1/2 medium onion sliced
3 cloves garlic peeled
1 cup grated fresh coconut
Salt to taste

For the tempering

1 tbsp oil (peanut/ sunflower/ rice-bran)
1 tsp mustard seeds
1 tsp cumin seeds
1/2 tsp asafoetida
5-6 curry leaves
1/2 tsp white udad dal (skinless split black gram) (optional)

Method:

De-seed the dried kashmiri red chillies and soak them in the warm water for about 20-25 minutes. 

In a grinder, grind together the soaked chillies, onion and garlic first for about 30 seconds. 

Then add the grated coconut, salt and half the water the chillies have been soaked in. Grind for about 1 minute till it's a little smooth. Adjust salt and water if required.

Remove in a bowl and keep ready for tempering.

Heat the oil in a tempering pan on low heat. Add mustard seeds, cumin seeds and asafoetida and let them crackle. 

Now add the curry leaves and fry on low heat till crispy. 

Lastly, add in the udad dal and fry till slightly red. 

Pour this tempering on the chutney. 

Mix well and serve. 


Monday, 8 September 2014

Healthy Falafel Rolls Recipe

Falafels are an integral part of the Lebanese, Palastenian, Middle Eastern and Mediterranean cuisines. Like any traditional dish, there are different versions of its recipe and preparation. The underlying similarity among them is that they are made of chickpeas. It's the herbs and spices that vary across cuisines.


Healthy Falafel Rolls Recipe
Falafels are traditionally served in a pita pocket with dips, condiments and pickles to spice it up. In my healthy version, I've shallow-fried the falafels instead of deep frying them (though the recipe remains the same if you wish to deep fry them) with little effect on the texture and wrapped them in a whole-wheat roti (an Indian unleavened bread) instead of a refined flour pita.

Healthy Falafel Rolls Recipe

Preparation Time: 8 hours (overnight soaking of chickpeas)

Cooking Time: 30 minutes

Assembly Time:  2 minutes per roll

Serves: 4

Ingredients

For the Falafels

2 cups chickpeas (kabuli chana) soaked overnight
1 medium onion finely chopped
2 tbsp finely chopped flat parsley
2 tsps cumin powder
2 tsps corriander powder
2 tbsps sesame seeds
1 tbsp gram flour (besan) for binding
3 tbsps olive oil
Salt to taste

For the rotis

3 cups whole wheat flour
2 tbsps whole wheat flour for sprinkling
1 1/2 cups water
1 tbsp oil

For the Lebanese Yoghurt Dip

1 cup hung curd
2 garlic cloves crushed
Salt to taste

For Serving

1 medium onion cut into thin slices
3-4 pickled jalapeno slices per roll

Method

Falafels 

Cook the chickpeas in a pressure cooker till done (about 15 minutes). Drain the extra water.

In a grinder, coarsely grind the chickpeas.

Add in the onion, chopped flat parsley, cumin and corriander powder, sesame seeds, salt and gram flour and make a dry mixture.

Make 1 inch balls from the mixture, flatten them a little and shallow fry on both sides on a medium high flame. Make sure they turn golden brown on both sides to get the falafel crispiness.

Roti 

Knead a pliant dough out of the wheat flour and water.

Use the oil to ensure the dough doesn't stick onto the plate or your hands. It will make for a better mixed dough.

Make a dough ball of 1 inch diameter. Sprinkle some dry whole wheat flour on the rolling suface, use a rolling pin in circular motion between both hands till you get a thin roti.

Heat a flat griddle and roast the rolled out roti on both sides till done.

Lebanese Yoghurt Dip

In a bowl mix together the hung curd, crushed garlic and salt. Whip together till you get a creamy smooth mixture.

Assembling the Rolls


Whole Wheat Rotis for Healthy Falafel Rolls
First take the roti and arrange the shallow-fried falafels on it.

Whole Wheat Rotis and Falafels for Healthy Falafel Rolls

Now add a layer of the creamy Lebanese yoghurt dip

Whole Wheat Rotis, Falafels topped with Lebanese Yoghurt dip for Healthy Falafel Rolls

Finally add in the onion slices, pickles and some parsley leaves.

Healthy Falafel Rolls

Roll it all together and serve!

Healthy Falafel Rolls


Thursday, 17 October 2013

Pan Seared Aubergines with a Yoghurt Dip

Aubergines or brinjals are one of my favourite vegetables but no one at my home likes them really so they rarely come home. I have adapted and tried this dish from a recipe I read a few days back. It is a pretty simple dish with lovely complexities of flavours. I am now hoping that others at home like it too so that I can make aubergines more often at home! This will make for a great party dish too. It's simple, quick to cook and easy to eat!

Pan Seared Aubergines with a Yoghurt Dip

Pan Seared Aubergines with a Yoghurt Dip

Ingredients

For the Pan Seared Aubergines

1 large aubergine or brinjal
1 tbsp olive oil
Salt to taste

For the Dip

3 tbsps yoghurt
1 garlic clove crushed
10 fresh corriander leaves finely chopped
5 fresh mint leaves finely chopped
Salt to taste

Method

Pan Seared Aubergines


Pan Seared Aubergines


Cut the aubergines into half inch rounders.


Aubergine rounders


Rub each slice with olive oil and season with the salt. Heat a pan and cook these slices on both sides. 


Cooking the aubergine slices on the pan

The best way to know that these are cooked is to see the skin colour. If the aubergines are done, the skin will turn brownish throughout the width of the slice. If the middle is still purplish, let it cook for a bit more.


Yoghurt Dip


Yoghurt Dip


The yoghurt needs to be thick and creamy for this dip. You can either hang it for half an hour or use the trick I have recently learned that I used. Put the yoghurt on your everyday chhalni with a bowl under for the water to drip into.

Yoghurt-chhalni trick

Leave the yoghurt like this for about 15 minutes and voila! I collected about half a bowl of water from 3 tbsps of yoghurt using this trick. 


The water collected from the yoghurt

Whisk in the crushed garlic clove, the fresh herbs and salt till it becomes a nice creamy dip. 


Adding the garlic and fresh herbs to the yoghurt


There are two serving options. You can serve the aubergines with the dip on the side.

Pan Seared Aubergines with the Yoghurt Dip on the Side

You can also serve a dollop of the dip on each aubergine slice.

Pan Seared Aubergine with the Yoghurt Dip on the Top


Monday, 7 October 2013

Corriander Mint Chutney

My best memory of this green goodness is from about five years back. A friend had come home to help me with Maths for an entrance exam. After we were done, in true Indian hospitality spirit, I had prepared hot fresh theplas for him to eat and I had served this chutney with it. He eats a bite of the theplas dipped in this chutney and goes, "The chutney is great!" And I was thinking, I just put in effort to make hot theplas for you and all you can think of is the chutney? That was a real wow moment for me!

And it has happened many times with me when people have specifically enjoyed the chutney and given it a special mention! Here's the recipe of this attention stealing chutney!

The attention stealing chutney


Ingredients

1 bunch corriander leaves
1/2 bunch mint leaves
1 tbsp daliya
2 green chillies
1/2 tsp sugar
Juice of half a lemon
Salt to taste

Method

Wash and clean the corriander and the mint leaves and separate them from their stems.


My favourite greens with all their possibilities

Roast the daliya on a low flame for about two-three minutes till they release a dry earthy roasted aroma.


Daliya being roasted

Put in the greens, the daliya, the slit chillies, the lemon juice, the sugar and the salt into a mixer bowl with a little water and blend well to form a smooth paste.

Blending the chutney
Serve as a dip for your favourite savoury snack.


Saturday, 5 October 2013

Apple Cinnamon Jam

The apple and cinnamon combination has been inspiring me quite a bit off late.

Apples and Cinnamon: My Inspiration
Apple and Cinnamon: Some more inspiration!


 After apple cinnamon oats, I now present my first ever attempt at making jam... apple cinnamon jam!

Presenting Apple Cinnamon Jam!

In this jam, the tartness of apples and the warmth of cinnamon are balanced out by the sweetness of sugar. It pairs amazingly well with toast and salted butter. A bottle of this jam can make a thoughtful handmade gift for someone too! 

Here is the recipe for this simple piece of joy!

Ingredients

500 gms apples
1/2 cup water
8 tbps sugar
1 tsp cinnamon powder
1/2 lemon juice

Method

Sterilise a glass bottle by washing it with soap and then boiling it with water for 15 minutes. Put the glass bottle in when the water is cold and you're heating it up. Putting a glass bottle in boiling hot water will cause it to crack!

Wash, peel and dice the apples in 1/2 inch cubes. You can grate them if you wish too. They are going to be mashed anyways to make the jam.

Diced apples

Heat a pan, add in the diced apples and 1/2 a cup of water. Stir it on a high flame for a couple of minutes till the water starts boiling and the apples start releasing their juices. Lower the flame and cover the pan till the apples cook through. This should take about 12-15 minutes but it is a good idea to keep checking the apples. 

Covering the apples to let them cook

Once the apples are cooked, remove the cover and use a potato masher to mash them thoroughly in the pan. Keep the flame low while doing this.


Mashing the apples in the pan

Now comes our flavour maker: add in the sugar evenly across the mashed apples. Keep the flame on low. Stir in properly and keep stirring so that the sugar doesn't burn till it is dissolved.

Stirring the sugar in

Once it is dissolved, you will need to stir it every 30 seconds. Do this till the jam starts leaving the sides of the pan and you have achieved the desired consistency of the jam. This should take about 10 minutes on the low flame. About a minute or so before you turn off the flame, or simply when the jam starts leaving the sides of the pan, add in the cinnamon powder and stir it in well. Don't put the cinnamon powder in too early as the flavour of cinnamon increases as you cook it and will become too strong and overpowering. 


Once you remove from the pan, cool the jam a little, add in the lemon juice and mix it in well.


Apply liberally on a buttered toast and serve your special handmade Apple Cinnamon jam with love!


Apple Cinnamon jam on a buttered toast


Friday, 20 September 2013

Hummus Platter

Special occassions call for special creations. My little brother had his 22nd birthday (okay, so he is not so little anymore then!) on Wednesday and I wanted to gift him something made from my love for cooking. He loves trying different types of cuisines that I try at home quite often. So I made something from a new cuisine with my twist to it for him: a Hummus platter. I made the Hummus platter with three types of Hummus: Regular Hummus, Basil Hummus and Spicy Hummus with whole wheat pita bread. He loved it! So it was quite a success!


Hummus Platter

The above picture has the Basil Hummus in the front, the Regular Hummus in the middle, and the Spicy Hummus at the farther end. 


Regular hummus is a post I have already done. You can click on the title to go to it!

Basil Hummus

Ingredients

1 cup chickpeas soaked overnight
5 tbsps seasame seeds
8-10 garlic cloves
6-7 leaves of fresh Italian basil
3 tbsps olive oil
Salt to taste
Water to adjust consistency

Method

Pressure cook the chickpeas. Roast the seasame seeds in a pan on a low flame till they are brownish and release their aroma. Blend with a little water to make the tahini paste.

In the blender, blend the garlic cloves, the basil leaves, the tahini paste and the salt to form a smooth paste. Add in the cooked chickpeas and olive oil and blend. Add water to adjust consistency as desired.

To serve, create a little depression in the middle and pour some olive oil into it (see picture above).


Spicy Hummus

Ingredients

1 cup chickpeas soaked overnight
5 tbsps seasame seeds
8-10 garlic cloves
6-7 leaves of fresh Italian basil
3 tbsps olive oil
1 1/2 tsps of red chilly powder
1 tsp of cumin powder
Salt to taste
Water to adjust consistency

Method

Cook the soaked chickpeas in the pressure cooker. Make the tahini paste by roasting seasame seeds as described above and then blending them with a little water to form a smooth paste.

Blend together the chickpeas, the tahini paste, the garlic cloves, the olive oil, salt and the red chilly and cumin powder. Keep adding water in little quantities till the desired consistency of the dip is reached.

Serve with some olive oil on it (see picture below).

Serve the different types of Hummus with pita bread toasted in a little olive oil and enjoy!


The three types of Hummus served with olive oil on them


Thursday, 21 March 2013

Hummus

For me, memories get attached to a food experience. So apart from the taste, flavours, touch, smell and textures of the food I am eating, the memories I create become an integral part of the food experience. So when I want to revisit those memories, I try and cook that dish in the kitchen. Since yesterday I have wanted to revisit some beautiful memories I have created eating hummus with fried pita bread from a small shop in the food court of a local mall so here I have been able to cook it today (the chickpeas need overnight soaking!)

Hummus is a traditional Lebanese dip made of chickpeas with a drizzle of olive oil on top served with hot and fresh soft pita breads (though fried pita bread sticks make for an interesting texture combination). Though not bland, it doesn't have too many complicated flavours (and isn't a complicated recipe!) and goes well with chips, khakra, and other such kinds of bread! It is also a spread used in falafel sandwiches and rolls.


Hummus served with olive oil and a drizzle of paprika


Hummus

Ingredients

1 cup chickpeas soaked overnight
5 tbsps seasame seeds
8-10 garlic cloves
3 tbsps Olive oil
Salt to taste
Water to adjust consistency

Method

Soak the chickpeas overnight at least for 10 to 12 hours and cook in a pressure cooker till done.

To make the tahini paste (that can be used in baba ghanouj, another Lebanese dip), toast the sesame seeds lightly in a thick bottomed pan on slow heat till they are slightly brown and before they start popping out of the pan like popcorn. Blend this in a food processor or mixer with 1 tbsp of the olive oil or a bit more to ensure it isn't dry.

To make the hummus, blend in a mixer or food processor the chickpeas, garlic, tahini paste and salt  with about 2 tbsps of the olive oil and water as desired to get a thick dip like consistency.

Serve in a bowl with olive oil poured on top.

Serving tip: I serve with a pinch of red chilly powder and roasted jeera powder sprinkled on top as it goes wonderful with the flavours of the dip and suits the Indian pallet's penchant for spices.

Tip 2: I also add 1 tsp of curd to the hummus mixture to add a beautiful texture and a depth of flavour.


Hummus ready to be eaten!


Just another angle shot of the hummus


Tuesday, 29 January 2013

Bengali Style Pineapple (Annarser) Chutney

My love affair with Bengali food began recently about 10 months back when I was introduced to the authentic version in Calcutta. From street foods to the classic Bengali meal (Bhojohori Manna), and the REAL Bengali sweets: rossogulla, shandesh etc, the love affair has just kept growing.

Today, I tried my hand for the first time at a small but an essential part of the traditional Bengali meal: the chutney ('chaatni'). I made a pineapple chutney borrowing the recipe online, ofcourse with my own twist on it! 

Annarser (Pineapple) Chutney

Ingredients

1/4th large pineapple chopped
2 tsps oil
1 tsp mustard seeds
1/4th inch ginger chopped
2 bay leaves
1 cup water
4 tbsps sugar

Method

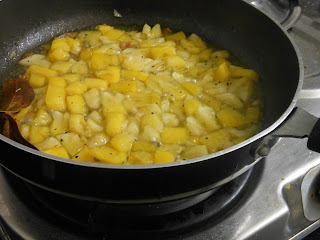
In a pan, heat the oil and add the mustard seeds to crackle. After the mustard seeds crackle add in the ginger and the bay leaves. Add in the chopped pineapple and sautee a bit.


Pineapples being sauteed in the tadka

Now add the water and the sugar and stir and cook till the chutney thickens.


Cool and serve. In a traditional Bengali meal, a course is papad served with chutney. 


The chutney


The chutney up close

The next time I am going to try and chop the pineapples a bit finer and make the chutney a little more syrupy. Though it turned a little bit dryish than what I have seen, the taste was brilliant! 


Tuesday, 1 January 2013

Homemade Pizza Sauce

Pizzas have seeped into our regular food so much so it has almost become a staple. Move over Pizza Hut and Dominos, every small and big restaurant including roadside stalls and college canteens serve it, even if its just a tomato ketchup with grated processed Amul or other cheese version. I know my aunty's very traditional  Gujju kitchen also has it once every couple of weeks because they enjoy it.

I believe that what makes or breaks a pizza is the sauce that is used to flavour it. The toppings or the cheese do not have much of a flavour of their own and the sauce adds layers of taste to the pizza. Here is a recipe of my homemade pizza sauce.


A fully loaded vegetarian pizza with the homemade pizza sauce


Homemade Pizza Sauce (for 4 8 inch pizzas)

Ingredients

2 tbsps olive oil
2 medium onions finely chopped
2 bay leaves
3-4 whole peppercorns
4 medium sized tomatoes pureed
 1/2 cup ketchup
1 1/2 tsps dried oregano or mixed dried herbs (thyme, basil, oregano, parsley and rosemary)
Salt to taste

Method

In a deep pan heat the oil and add the bay leaves and the peppercorns when the oil is heated. Add the chopped onions and saute till pink. Then add the pureed tomatoes and cook. Stir in the ketchup, the herbs and the salt to taste. 

To make a pizza, toast the base as desired, spread a layer of the sauce, the cheese and the desired toppings (three kinds of peppers, American corn, olive slices etc). Cover and cook till the cheese melts and serve hot!


Cheese and olives pizza with the homemade pizza sauce

Saturday, 25 August 2012

Palak kanda bhajiya with dipping sauce

Saturday again! And though its sunny outside in the middle of monsoon, it still doesn't take away tbe cravings for pakodas!
So what do I have available? Some spinach...and some onions... perfect for pakodas!
Here is the recipe of this snack, of  which I was just about able to snap a pic before it disappeared...
Palak onion bhajiya
10-15 palak leaves
1 medium onion
4 tbsp of besan
Salt to taste
1 tsp of rock salt
2-3 tsps dhania jeera powder
2 tsps jeera powder
Pinch of turmeric
1 1/2 tsp red chilly powder
1/2 tsp of ajwain seeds
Water to bind
Oil for frying
Shred the palak into 1 cm stripes. Finely chop the onion and add to the palak. To this add the besan and all the masalas. Mix this dry mixture so all the vegetables get coated by the besan and the masalas. Slowly add the water and bind till the batter is just about wet.
Heat the oil for frying. Make small balls of the mixture using your fingers (like small morsels of food are made while eating). Fry on medium flame till golden brown on the outside and cooked inside. Serve hot with the dipping sauce (recipe follows).
Dipping sauce
10 corriander leaves
5 mint leaves
1/2 green chilly
5 tbsps tomato ketchup
A pinch of dhania jeera powder (the clincher!)
Finely chop the corriander, mint leaves and the green chilly and add to the tomato ketchup. Add the dhania jeera powder. Mix well and serve.